Sunday, May 19, 2013

Overclocking Asus EeePC 1015BX

Asus EeePC 1015BX is a cheap netbook with AMD APU C-60 with ATI HD 6290 graphic chipset. 2 GB RAM are soldered on mainboard so there is no chance to upgrade it.

By default the clock speed of C-60 is 1.0Ghz but this CPU has Turbocache which is can boost the speed automatically to 1.3Ghz when it load some heavy application. But I’m not satisfied with this speed when I need it to play a heavy game like Assassin’s Creed 2.

This is the CPU-Z result before and after overclocked :

notoc

brazosoc

I found a way to overclock this CPU with a software called Brazos tweaker. And I’m surprised, this low end processor can overclocked to 1.6 Ghz easily. Here I show you how to do it.

  1. Download Brazos Tweaker here.
  2. Set P0 State Mult = 2.5 VID = 1.0500, P1 State Mult = Default VID = 0.900, P2 State Mult = 8.0 VID = 0.75
  3. Just leave the other set by default
  4. Choose High Performance, Apply and reboot.

Now I can play my fave Assassin’s Series with better FPS. Enjoy.

Wednesday, May 1, 2013

Installing Java on Ubuntu

Yes, I believe in the present day everybody use Java. So I don’t need to explain what is Java because you can found it on Wikipedia or another site to getting know more.

Here I just want to make a notes for my self, cause I’m tired to searching this method on the net every time I need to installing  Java on Ubuntu. Here’s the steps:

First you need to remove openjdk if it’s installed or if you don’t know is it installed on your system. Just remove it from your terminal (Ctrl-Alt-T) with this following command.

sudo apt-get purge openjdk*

If you have Java installed from another PPA and you are having problem with it then you have to do following steps before installing the new one.

sudo rm /var/lib/dpkg/info/oracle-java7-installer*

sudo apt-get purge oracle-java7-installer*

sudo rm /etc/apt/sources.list.d/*java*

sudo apt-get update

Now you can install the new Java with this following commands

sudo add-apt-repository ppa:webup8team/java

sudo apt-get update

sudo apt-get install oracle-java7-installer

You can check the Java version by searching Java Control Panel on Dashboard.

Wednesday, April 24, 2013

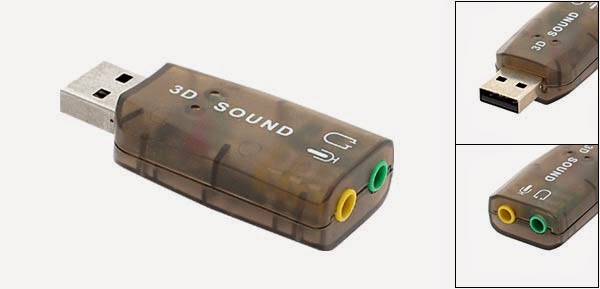
USB Audio Detected But No Sound on Ubuntu (Solved)

After doing a fresh installation of Ubuntu 12:04, I did update and upgrade. Add some apps and tweaking in order to Ubuntu faster and more reliable.


But when it did restart, suddenly the sound was not heard again. I am trying to find the cause of this. Ensure that the USB Audio detected by Ubuntu using this command.


The output of the command is as follows:

**** List of PLAYBACK Hardware Devices ****
card 0: NVidia [HDA NVidia], device 3: HDMI 0 [HDMI 0]
  Subdevices: 1/1
  Subdevice #0: subdevice #0
card 0: NVidia [HDA NVidia], device 7: HDMI 0 [HDMI 0]
  Subdevices: 1/1
  Subdevice #0: subdevice #0
card 0: NVidia [HDA NVidia], device 8: HDMI 0 [HDMI 0]
  Subdevices: 1/1
  Subdevice #0: subdevice #0
card 0: NVidia [HDA NVidia], device 9: HDMI 0 [HDMI 0]
  Subdevices: 1/1
  Subdevice #0: subdevice #0
card 2: AUDIO [USB  AUDIO], device 0: USB Audio [USB Audio]
  Subdevices: 1/1
  Subdevice #0: subdevice #0

Indicates that the actual USB Audio is detected by the system. However, the system does not select it as the default audio. Then the my task is the revamp USB Audio as the main sound card on the computer. Here is how to change the default USB audio sound card.


1. Edit the file /etc/modprobe.d/alsa-base.conf . Since this is a system file you will need to sudo to get this done. e.g.

$sudo nano /etc/modprobe.d/alsa-base.conf

2. Scroll down to the end. Now you have to change the line which says

options snd-usb-audio index=-2

to

options snd-usb-audio index=-1

Reboot and it should work.

Monday, April 22, 2013

Can Not Post or Reply a Comments on My Own Blog

Someone has been asking me something on my blog someday. And I have to answer it soon. After wrote the long answer, It won’t send and back to empty space on my comment box.

I think, it’s must be something wrong with my blog templates modification. So I change it to default template and try again. But the problem still there.

While I’m looking solution for this problem over the internet. I’ve found this because of the browser setting and it can fixed easily. I’m using Google Chrome and I think it would be same method for another browser like Mozilla or Internet Explorer.

1. On your Google Chrome goes to Setting

2. Scroll to bottom of page and click Show advance settings…

3. Click Privacy – Content Setting button

4. Uncheck Block third-party cookies and site data

5. Click Done


That’s all.

Friday, November 23, 2012

Easy Way to Share Internet from Ubuntu to Mobile Device

If you are trying to share your internet connection between computers, you can easily to make ad-hoc connection on your laptop and share it to the others. But it's getting hard when you tried to share your laptop internet connection to another mobile devices like Android or Windows Mobile. Because not every devices can read ad-hoc access point across platform. Here it is I'll show you  how to make it possible.

I have to inform you what I've been use to do this action:

1. Asus EeePC 1015 BX (netbook) with Atheros series WiFi
2. Android Tablet with Gingerbread version 2.3.4
3. Ubuntu 12.04 LTS Precise
4. USB Modem CDMA EVDO

First thing you need to install some supporting application. Open the Terminal console you can found it on Unity Menu or press Ctrl-Alt-T on keyboard. Then type this following command:

sudo apt-get install hostapd
sudo apt-get install dhcp3-server

or copy the command above and hit Ctrl-Alt-V to paste on Terminal

create hostapd.conf file with this command:

sudo gedit hostapd.conf

Then add this following text on hostapd.conf file:

interface=wlan0
driver=nl80211
ssid=replace_this_SSID_name
channel=1
hw_mode=g
auth_algs=1
wpa=3
wpa_passphrase=replace_this_password
wpa_key_mgmt=WPA-PSK
wpa_pairwise=TKIP CCMP
rsn_pairwise=CCMP

Save it.

Now edit dhcpd.conf file

sudo gedit /etc/dhcp3/dhcpd.conf

And add this following text to file:

option subnet-mask 255.255.255.0;
default-lease-time 600;
max-lease-time 7200;

option domain-name-servers 8.8.8.8, 8.8.4.4 ;
subnet 192.168.1.0 netmask 255.255.255.0 {
range 192.168.1.10 192.168.1.254;
option broadcast-address 192.168.1.255;
option routers 192.168.1.1;
}

(no need to worry if the file is empty, just add those text above)

Edit dhcp3-server file : 

sudo gedit /etc/default/dhcp3-server

Find INTERFACES="" text and change it to INTERFACES="wlan0"

Now you have to forward your internet connection by editing this file

sudo gedit /etc/sysctl.conf

Remove the hash symbol on # net.ipv4.ip_forward=0
then change the value from 0 to 1

Then edit rc.local file : 

sudo gedit /etc/rc.local

Add this text below :

/sbin/iptables -t nat -A POSTROUTING -o ppp0 -j MASQUERADE
ifconfig wlan0 inet 192.168.1.1 netmask 255.255.255.0
hostapd -d hostapd.conf &
/etc/init.d/dhcp3-server restart

Just before "exit 0" script.

If you want to share internet connection on LAN, just replace ppp0 with eth0.

At this step, you can reboot your computer.

Connect the computer to the internet with USB modem or LAN then run the hostapd application to share the connection from WiFi with this command from Terminal console:

sudo hostapd ./hostapd.conf

You computer is already to an Access Point. Next, you have to setup your mobile devices.

Turn on WiFi on your mobile and scan for available network. Choose your already made hot spot and fill the password. If your mobile device can't obtain IP address. So you need to input  it manually.

You can put this address on your mobile:

IP address : 192.168.1.10 to 192.168.1.254 
Netmask : 255.255.255.0
Gateway : 192.168.1.1
DNS 1 : 8.8.8.8
DNS 2 : 8.8.4.4

It shoud work now.

Tuesday, November 20, 2012

How To Download Youtube On Linux

Sometimes I want to watch some videos from Youtube, but I can't access to internet any time. So I need to download the videos to watch it later. There is several ways to download Youtube videos. And here I show you how to do.

I'm using LinuxMint 14 "Nadia" RC and I believe it will be the same thread for another Debian based distros like Ubuntu. LinuxMint was based on Ubuntu.

1. Minitube

With this application, you can stream the videos without opening your browser, and you can directly download the videos.

How to install :

Minitube was include on LinuxMint 14 package, so you can searching this application on Software Manager. Or you can download it from terminal with this command :

sudo add-apt-repository ppa:nilaimogard/webupd8
sudo apt-get update
sudo apt-get install minitube

You can find MiniTube application on Menu -> Sound  & Video

2. Via Terminal with youtube-dl

I really like to use this method because it was so "Linux". That's what a different between Windows and Linux. While you decide to stuck your life on linux machine, you can't leave the terminal console like you overlook command prompt on Windows.

First thing you have to do is make sure you have installed "youtube-dl" on your linux OS. If you haven't, you can follow this instruction:

Open Terminal console and type

$ sudo apt-get install youtube-dl

Ones you have completed the installation, you can download videos from Youtube using this method. First you need to open your favorite videos from browser like Firefox or Chrome to find the url address. Then you can copy the following address or type it on terminal.

This some explanation how to use youtube-dl in common:

Open the terminal console from Menu -> Terminal

Type this command :

$ youtube-dl -f 22 -t http://www.youtube.com/watch?v=_776faHD4oo&feature=fvst

-f is mean format and 22 was a code for a video format you want to download.
-t is mean the downloaded video file named using title of the video.

You can found the list of video format code from Wikipedia. The codes are on itag value column.

Your downloaded videos will be stored at your Home folder.

Note : After the installation, you need to update youtube-dl application using this command:

$ sudo youtube-dl --update


That's all.

Sunday, November 18, 2012

Memasang Text Box dan Text Area Pada Blog Post

Pada beberapa artikel, terutama yang berbentuk tutorial. Terkadang saya merasa kesulitan jika harus meletakkan script atau code pada artikel. Karena umumnya kode-kode maupun script sangat panjang. Tentunya akan menjadikan postingan kita sangat panjang jika kita meletakkan begitu saja pada postingan.

Oleh karena itu saya membutuhkan text box atau text area. Perbedaannya adalah text box memiliki scroll bar sementara text area tidak. Keuntungan menggunakan tex box pada postingan supaya pembaca tidak bingung antara artikel dan code. Sehingga memudahkan mereka untuk melakukan copy paste.

Berikut cara menambahkan Text Box pada blog post :

Pembaca bisa mengedit Text

Letakkan kode berikut ini pada artikel blog untuk membuat Editable Text Box. Ingat anda harus beralih ke mode HTML pada blog editor.

<textarea rows="5" cols="40">
TEXT
</textarea>


Atribut cols menunjukan jumlah teks yang akan ditampilkan pada kolom, sementara rows adalah jumlah baris pada text box.


Read Only Text Box

Pada read only text box, pembaca hanya bisa membaca namun tidak bisa menambahkan atau menghapus isi text box. Tetapi pembaca masih bisa melakukan seleksi dan copy pada text box.

<textarea rows="2" cols="30" name="Famous Quotes" readonly="readonly">
TEXT
</textarea>

Atribut name hanya sebagai judul dari text box yang hanya bisa dilihat pada script html dan tidak muncul pada artikel.


Text Area Word Wrap 

Selain Text Box juga ada Text Area untuk meletakkan teks, kode atau script pada postingan blog anda. Jika anda ingin menampilkan semua tulisan tanpa harus menggunakan scrollbar anda bisa menggunakan metode ini.

<textarea rows="8" cols="30" wrap="hard">
TEXT
</textarea>


Demikianlah beberapa cara membuat text box dan text area pada artikel blog anda. Semoga bermanfaat!